Looking for Redtail WebMail guide? Find everything you need to know about using this Redtail Webmail Here.
What is Redtail WebMail?
Redtail Webmail is an email service which may be accessed using a standard web browser. Redtail’s Email Hosting Service provides all subscribers with access to their webmail client, so you can access your email from anywhere using internet connection.
Redtail webmail provide many features and powerful tools like an advanced email archiving function, no storage limits, redtail crm integration, POP3, IMAP4, MAPI accounts, anti-virus and spam protection, and more.
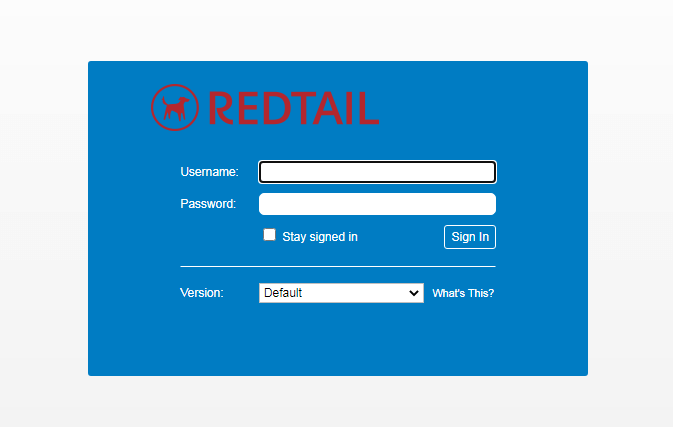
Redtail Webmail Log in
- Visit their official website.
- Click on Login Button
- Click on Email
- Enter your username and password
- Click Sign In button
How To Access in Redtail Webmail Log in?
Ways to Log In:
Option 1:
- Open your Browser In your PC or Laptop.
- Visit their Webmail login page
- Type your Username and password, then click on Login.
How to Redtail Email Setup for iPhone?
- Go to iPhone settings option.
- Click on Mail on menu
- Then, tap Accounts
- Next, click on Add Account
- Select Other
- Next click on Add Mail Account and enter following details:
– Name: enter your name
– Email: Enter your full email address
– Password: Enter your email password
– Description: Description. - Click Next.
- Select IMAP and enter following details under Incoming Mail Server
– Host Name: imap.redtailtechnology.com
– User Name: Enter your full email address
– Password: Enter your email password - Under Outgoing Mail Server enter following details:
– Host Name: smtp.redtailtechnology.com
– User Name: Enter your full email address
– Password: Enter your email password - Then click on Next Button.
- Next, you will choose which type(s) of data you would like to synchronize to the device. Be sure that you have you have Mail turned on
- Tap Save to continue.
Congratulations, you can now send and receive email on your iPhone device.
Set Up ActiveSync On My IOS Device
- Open Settings app in your device
- Tap Mail
- Next, click on Accounts
- Next, tap Add Account
- Select Exchange and enter following datails:
– Email: Enter your full email address
– Description: Description - Click Next and then choose Configure Manually
- Now, enter your account password and enter following details
– Email: Enter your full email address
– Server: mapi.redtailtechnology.com
– Domain:
– Username: Enter your full email address
– Password: Enter your email password
– Description: - Tap Next to continue.
- Then, you will choose which type(s) of data you would like to synchronize to the device by sliding the corresponding slider(s) for Mail, Contacts, Calendars and/or Reminders
- Tap Save to continue.
Redtail – Incoming and Outgoing Server Details
| Redtail Incoming (POP) Mail Server details | |
|---|---|
| Account Type | POP |
| User Name | Your Email Address |
| Password | Your Email Account Password |
| Server host-name | pop.redtailtechnology.com |
| Server Port | 995 |
| Required Authentication? | |
| SSL/TLS | Yes |
| Redtail- Incoming (IMAP) Mail Server details | |
|---|---|
| Account Type | IMAP |
| User Name | Your Email Address |
| Password | Your Email Account Password |
| Server host-name | imap.redtailtechnology.com |
| Server port | 993 |
| Required Authentication? | |
| SSL/TLS | Yes |
| Redtail- Outgoing (SMTP) Mail Server details | |
|---|---|
| Account Type | SMTP |
| User Name | Your Email Address |
| Password | Your Email Account Password |
| Server host-name | smtp.redtailtechnology.com |
| Server port | 465 |
| Required Authentication? | |
| SSL/TLS | Yes |
Setup Redtail Email Account on Android Phone
- Step 1
Open Email app in your android device - Step 2
Click on Settings, under menu - Step 3
Tap Add account - Step 4
Choose Other Providers - Step 5
Type your email address and click the arrow to continue - Step 6
Select IMAP - Step 7
Type your Password and click the next arrow - Step 8
Under Incoming Server settings enter following details
– Username: enter your full email address
– Password: enter your email password
– Server: enter imap.redtailtechnology.com
– Port: 993
– Security type: SSL - Step 9
Then, click the next arrow and enter Outgoing server settings details
– SMTP server: smtp.redtailtechnology.com.
– Port: 465
– Username: enter your full email address
– Password: enter your email password - Step 10
Then, tap the next arrow - Step 11
Finally, look over and make any desired changes to your options for the Email account and click the right arrow
Email Setup On Windows (7) Mobile Devices
- Step 1
Go to Application List and Select Settings - Step 2
Select Email & Accounts - Step 3
Click on Advanced Setup, then tap Internet email account. And enter following details:
– Account name: Enter name for the account.
– Your name: Enter your name.
– Incoming email server: imap.redtailtechnology.com
– Account type: IMAP4.
– User name: your full email address.
– Password: your email password.
– Outgoing (SMTP) email server: smtp.redtailtechnology.com
– Outgoing server requires authentication:Yes
– Use the same user name and password for sending email: Yes - Additional Information:
– With SSL selected, your incoming server port will be 993 and your outgoing server port will be 465.
– Choose your Download Settings, then select Sign On
Outlook 2016: Redtail-Hosted Email Setup
- Step 1
Open Outlook, click File on toolbar and select Add Account - Step 2
Select the Manual setup or additional server types button followed by the Next button. - Step 3
Select the POP or IMAP, then click on Next button - Step 4
POP and IMAP Account Settings window will appear, enter following details:
User Information
– Your Name: Enter your name
– E-mail Address: Enter email address
Server Information
– Account Type: POP3 or IMAP
– Incoming mail server: imap.redtailtechnology.com
– Outgoing mail server (SMTP): smtp.redtailtechnology.com
Logon Information
– User Name: Type your full e-mail address
– Password: Enter your Password
Place a check in the Remember password box but do not check off the box to Require logon using Secure Password Authentication (SPA). - Step 5
To configure these settings, you will click on the More Settings. - Step 6
Next, Internet Email Settings window will appear. - Step 7
Go to the Outgoing Server tab and check the box for the option My outgoing server (SMTP) requires authentication. - Step 8
Next, you will go to the Advanced tab, select SSL for the Use the following type of encrypted connection option for both Incoming and Outgoing server.
– IMAP Ports: 993(ssl)
– SMTP Ports: 465(ssl) - Step 9
Next, click OK and return to the POP and IMAP Account Settings dialog box. - Step 10
Click the Next button and Outlook will test the settings you entered. If all the information was entered correctly, you will receive Complete for both incoming and outgoing tests. - Step 11
After the test is complete, click Close then Finish button
About Redtail
Redtail Webmail Content Overview
- What is Redtail WebMail?
- Redtail Webmail Log in
- How To Access in Redtail Webmail Log in?
- How to Redtail Email Setup for iPhone?
- Set Up ActiveSync On My IOS Device
- Redtail – Incoming and Outgoing Server Details
- Setup Redtail Email Account on Android Phone
- Email Setup On Windows (7) Mobile Devices
- Outlook 2016: Redtail-Hosted Email Setup
- About Redtail
Read Also: Insightbb Webmail
Submit your review | |
Redtail WebMail
Average rating: 0 reviews